This is a demonstration showing the
installation of a flexible LED strip inside of a glass cabinet. Tools and products needed for this
project are your power drill, step drill bit, household screwdriver flexible LED strip and power supply lead. The power supply lead will more than
likely be an interconnect cable within the system. You’ll likely be tying the glass cabinet LEDs into your under cabinet lighting system. You’ll be installing the flexible LED
strip around the front perimeter of the cabinet.
Start by removing any shelving from the cabinet. You’ll then remove the door using a household screwdriver. Use this tepid to drill a 3/8 inch hole where the power supply lead will enter the cabinet box. The hole will likely be at one of the
front corners of the cabinet. When starting your LED installation you need to be sure that there’s at least one half inches of space between the bottom
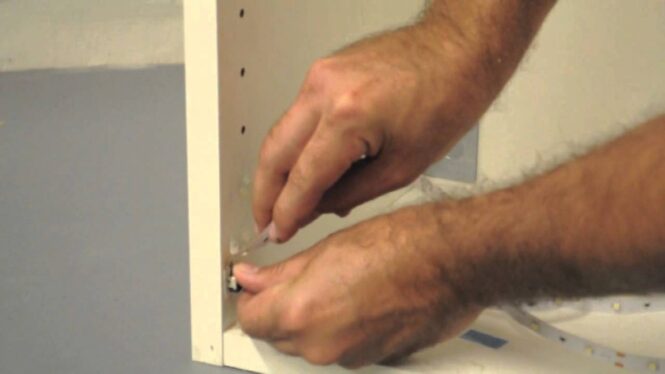
of the cabinet box and where your LED run begins. Peel the adhesive from the flexible LED strip and begin to work your way around the front perimeter the cabinet box. Stay as close to the front edge as possible.
When you reach the corner, don’t be scared to bend or crease the Flex to make
the 90 degree turn. Throughout the strip, there are resistors and diodes. Be mindful that you don’t crease or fold the flex over those components. Carefully work your way around the
perimeter, peeling the adhesive as you go. It may be helpful to draw a guideline that
can be followed as your placing the LED strip. The LEDs should be close to the fronts of
the cabinets. We’re leaving space for the hinges to be refastened. The goal is to have the LEDs hidden behind the cabinet door frame when the doors closed. Connect the power by poking the cable through hole and plugging them into your LED connector. It’s likely that the power source will be
coming from a cable that is tied into another LED strip. Re-attach the door to the cabinet box and fasten the hinges using your standard screwdriver. As you can see the LEDs are visible
when the door is open but, hidden when the door is closed. The
beauty of this type of installation is that the doors are closed ninety-nine
percent of the time.

The color temperature you’ve seen throughout the video is cool white but, the LEDs are also available in warm white. Mid-connectors are a great tool when you have access to the tops of the cabinets. These connectors have a 4-inch sleeve that is soldered directly to the center of the LED strip. It allows you to keep all your cables our of site on top of the cabinets. Using your step bit, drill a 3/8 inch hole
at the front top center of the cabinet box.
Poke your mid-connector through the hole and terminate the power on top of the cabinet. If you have any other questions about in
cabinet lighting, feel free to contact us and inspired LED..

