
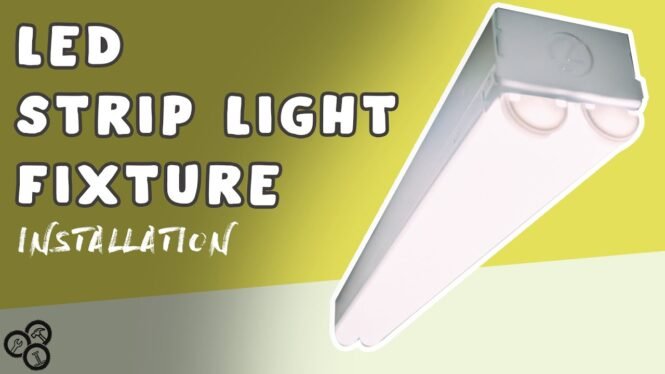
welcome back to another episode of tech Nachi Woodworks with me tim tag nachi this video will be a bit different than the other since there is no Woodworks in this one instead i’ll be showing you how to replace a light bulb with an LED strip light but I have a feeling you already knew that anyways first thing we’re going to need is an LED strip light either make one appear out of thin air or head to the store because this is imperative to the project first carefully examine the box yep that’s the right one once you’ve confirmed with yourself that you did indeed make the right purchase go ahead and open up that box and take out all the components which is most likely the light and a set of instructions and speaking of instructions that does seem like the next logical step in our process so let’s take a look and see what we got here okay look standard here are all the pieces make sure you turn off the circuit breaker don’t electrocute yourself okay I think I got it go ahead and crinkle up those instructions find the nearest trash bin and shoot oh darn it there we go after you realize that you are not in fact an electrician or a professional basketball player go ahead and head to the trash bin remove the instructions and unwrinkled that ball of paper because reading this is actually important if you want to install these the right way before we get started let’s grab the necessary tools to complete this project and that includes a hammer a screwdriver and some pliers I’m not sure which kind so I grabbed two oh and I’m not sure why but some high protection as well now it’s time to pick up the LED strip light and remove the wire way cover to do this lift upward on the exposed edges of the part starting in the middle and working your way outward once this has been removed go ahead and remove the parts back in place in a convenient location during installation it looks like I may have missed the shot where I show you the parts back and myself placing them in a convenient location but I’m sure you can figure this part out without seeing it the parts back contains some tiny screws which I didn’t end up using and a few wire connectors next let’s head on over to the light bulb that we’ll be replacing and take it out of the socket you’ll want to shut off the light and let it cool before Bowl unless they’re already LED light bulbs which means they won’t be hot to the touch let’s go ahead and remove that light bulb socket with a screwdriver there should be two screws and whoa this is a terrible camera angle let’s change that hmm not really any better Tim but artistic though let’s try again there we go and since we have not shut off the circuit breaker yet let’s be careful when pulling this from the ceiling as to not shock ourselves with any exposed wires off that is disgusting speaking of circuit breakers now is a good time to head on over to that and shut off the power to these slides so we can move on to the next step which will be disconnecting the wires from the socket itself so we can make room for our new and improved LED power strip I lied the next step is for you to give your dog some attention if they were hanging out by your workshop watching you work in the shop if your dog is like mine he loves playing fetch with the frisbee but refuses to drop the frisbee for you to throw it instead he runs away with it and expects you to fetch him as you make your way back into the shop grab the power strip and head to that giant hole in the ceiling if this was anywhere else in my house it would probably take the time and to patch this up but honestly it didn’t bug me much and the only one seeing the exposed hole on the side of the power strip will be me oh and maybe all of you as well anyways grab a pencil and line this baby up on your ceiling so you can mark off the placement for the screw holes while trying to maneuver from one side to the other without moving the light strip too much so the holes line up after you have those marked out grab your drill and give it the old pre-drill on the smaller side of the marking this is where the screw will ultimately sit after you slide that puppy up on your ceiling and this is the exact time when I realized why the instructions called for safety glasses and unless you hit a stud when drilling you’ll probably need some sort of toggle bolt or suitable fastener for the screws I’m going with these self drilling drywall anchors one thing to note make sure you use a screw with a wide enough head so it doesn’t slip through the keyhole on the light strip the recipe calls for a number-10 wood screw to install the drywall anchor put the tip in the hole you just drilled and slowly start screwing it in and while you’re at it get your mind out of the gutter Tim the camera angle how many times do I thank you anyways take your time with this because these things are finicky and can easily break apart in the ceiling which is no bueno screw the anchor in until it’s resting on the surface of the ceiling now insert the screws into the drywall anchors and if you want to follow my same process start with the screwdriver then realize it’s taking way too long get impatient then switch on over to your drill don’t screw these in all the way because you’ll need to leave some room for the light kind of like this and I realized I forgot to cover this earlier so I’ll bring it up now in order to make room for the wires to feed into the strip you’ll need to remove the knockouts to do this place a standard screwdriver on the edge of the circle opposite from the side with the retaining tabs and gently strike with the hammer until you can grab it with some pliers to which you’ll flex back and forth until it is removed good job now back to the installation grab the light and head on up to the ceiling first feed the wires through that piece that you knocked out great job on that by the way and shimmy the fixture onto those screws that we put up a few seconds ago don’t be afraid to let the light dangle for a little bit just make sure you lay it to rest gently grab that trusty screwdriver of yours and tighten up those screws so the light doesn’t move around anymore and now we’re on to the last and final step here which includes stripping the black and white wire leads with wire strippers or whatever you have that can strip wires to expose roughly 3/8 to 7/16 of an inch of bare metal wow that is very specific once you’ve done that connect the house wires to the fixture wires black to black white to white green to green or bare copper ground wire put on the wire knot and twist until the two wires get to know each other comment below if you got the reference to that phrase or how I’ve been styling my entire video once that’s all set put the casing back on head to the breaker and turn the power back on flip the switch and watch the light turn on from three different camera angles [Music] and that’s it a super easy way to replace a light bulb fixture with a strip of LED lights I’m not an electrician I’ve never done that before but the process was super easy you just take the black wire and connect it to the other black wire and the same goes for the white I’m really excited because it definitely brings up this little corner of my workshop area where I have my CNC so I’m looking forward to the extra visibility in this area if you liked the video give it a thumbs up if you’re not already please subscribe and I will see you in the next one you